Home Tutorials About Me Video's Cards for Sale

Saturday, 16 October 2010

Oh no! I'm late.....

Here's what I have been up to - a very good friend was celebrating a special birthday with a party today, I asked her husband who had arranged it all if I could help set up the tables. What was the colour scheme?
Well bless him, he had been out and bought the bright birthday balloon tablecloths that aren't usually seen at a party past the age of six. Now my friend is an elegant and sophisticated woman, who would probably have chosen a scheme of hot pink and silver....... you get the picture. So I dashed out to get tissue paper and was still making dratted paper flowers at 2 a.m, I made about forty of the things, but it was worth it, we scattered groups of them around, and the tables looked great, really bright and funky. It was a super party, thank you Howard and Carol xx

I am a day late posting my Polkadoodles card for this week. We were asked to make something

SPOOKY

Before I get to my card, I can't tell you what fabulous stuff the design team have come up with for this challenge, creative bunch. Do go over and take a peek, and of course if you join in with the challenge, there are blinkies and a prize up for grabs each week

For my card, I sprayed the background white cardstock with some black krylon spray webbing, it gives a very random spooky effect, (and added a bit of a modern art feel to the red green and blue paint splashes already on my garage floor)

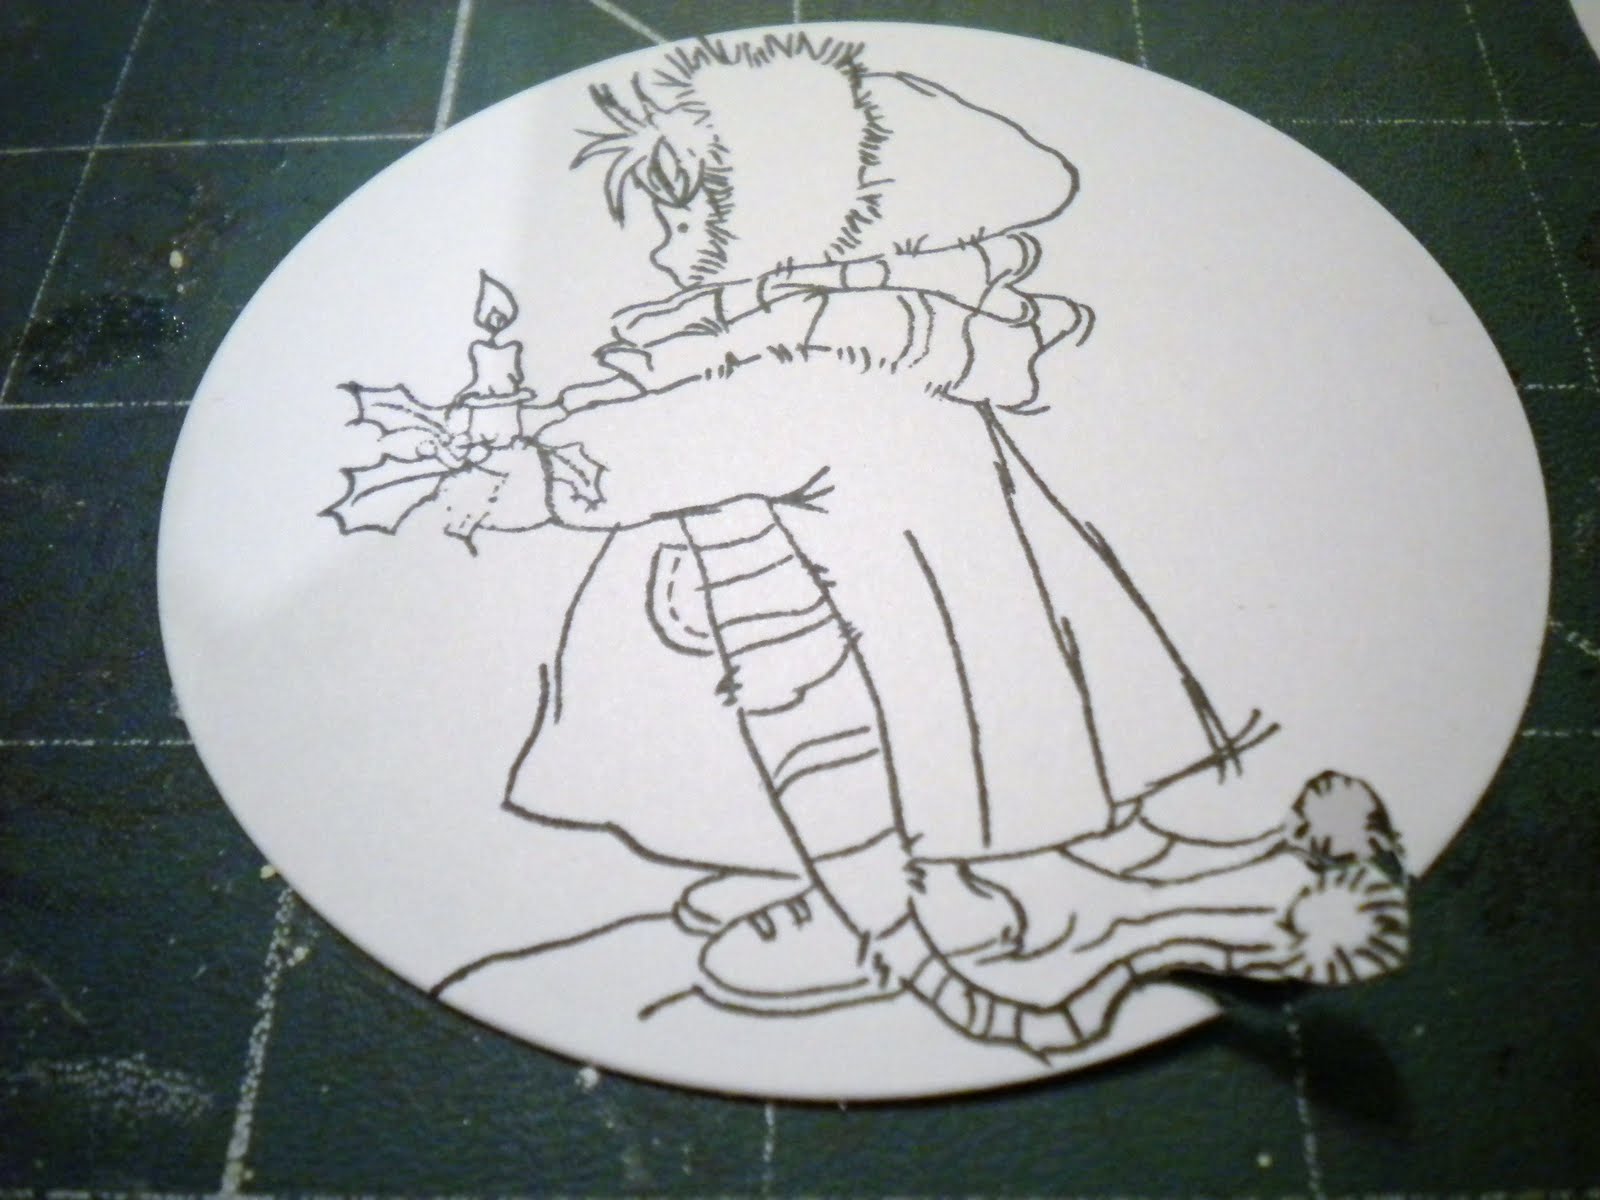
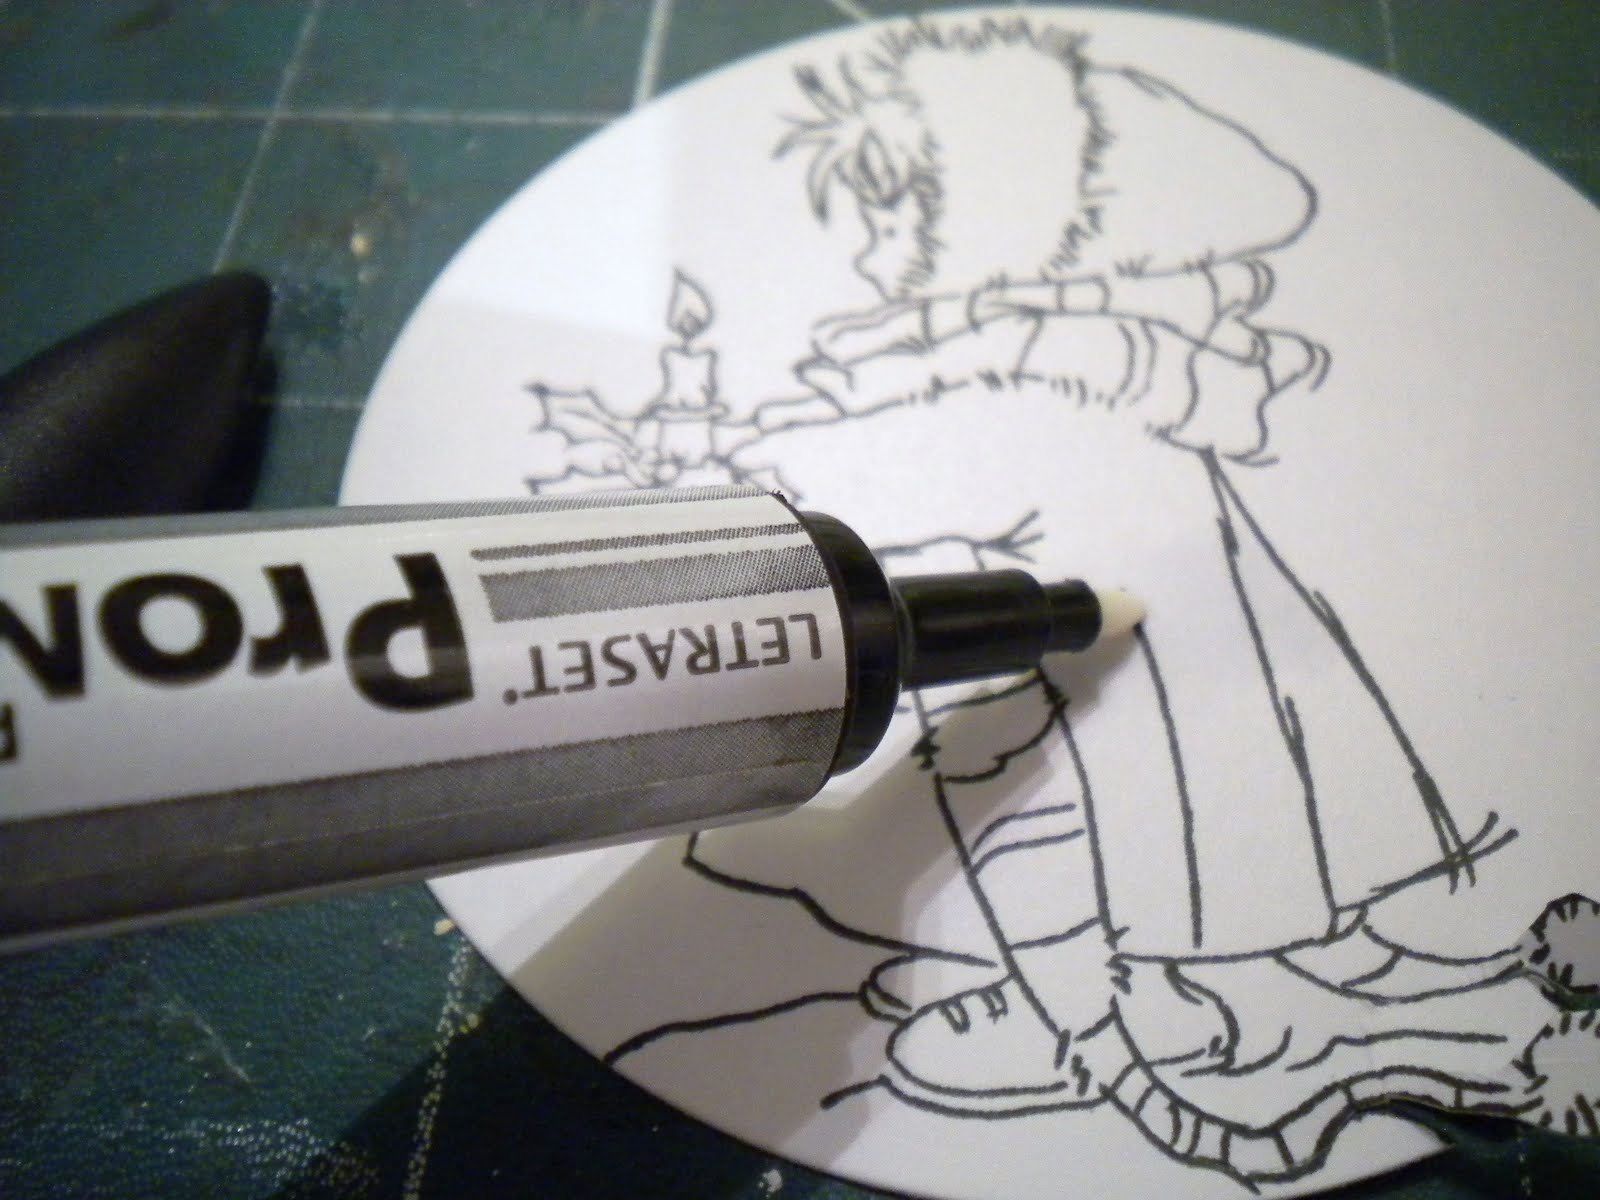
.......... whilst I waited for it to dry, I printed out elements from the autumn section of the Sundae of Seasons CD, available from Polkadoodles. I printed her out already coloured in, all I had to do was cut her out with the pumpkins and stick her on with foam pads.


I painted the pumpkins with Glossy Accents


the sentiment was printed out as well


I will draw the winner of the 'best of both worlds' blog candy tomorrow.... see you then

Thursday, 14 October 2010

Sending Hugs.....

This sweet little image is an acrylic stamp by Kanban (UK). The papers are by Paper Pizzaz, and the sentiment is by Craftwork Cards


The border punches are EK Success, and the ribbon was a gift - I think it's from Michaels

I found the inverted scallop nestability on sale in Hobby Lobby, so of course I bought it - I would buy a used tea bag if it was on sale. I wasn't at all sure if I would use it, but now, I love it, you will be seeing it again I'm sure

Promarkers used:

Ivory, blush and pastel pink

blossom and pink carnation

primrose and buttercup

sandstone, burnt sienna and warm grey 5

Ice grey 1 to shadow


I am working on getting a few Promarker videos done, not that I am any sort of expert, but alcohol inks seem so confusing to a lot of people who are new to them, that I thought a few simple tips might be useful. Now to clear a space on my table so that I can squeeze the camera on. I often wonder how the people who take videos from above do it. Do they have a device like a miners helmet with the camera strapped to that? Do they have a film director type on hand to film over their shoulder? Do they strap a camera to a step ladder? It's a mystery to me. You will have to put up with my upside down or sideways angles.
See you tomorrow

Wednesday, 13 October 2010

Doily Card - Cindy Lou

Here's another of those doily cuts from the Cindy Lou cartridge. The borders are those wide martha punches, the doily was cut at 3 1/2" and the sentiment button is by Craftwork Cards. It looks quite a fancy card, but it was really quick and easy to make

You may have noticed a 'vote for us' logo from Promarkers at the top of the blog. Letraset have been nominated for an award, so if you love your promarkers, please click on the link and vote for them. It won't take long, and you get to see who else has been nominated as well.
I am up to my eyeballs in snowflakes here - working on a Christmas project that is taking forever and I am not totally sure that it is going to work out as planned. Hey ho, it's only paper.....
See you tomorrow

Tuesday, 12 October 2010

You're tea-riffic

Here's another gorgeous little image from Lili of the Valley. The cardstock looks blue in the photo, but is actually lilac.

I got the tiny roses online, but can't remember the link, sorry. The punch is EK Success, nested shapes by spellbinders, sentiment by Fiskars
Promarkers used@
blush, ivory, soft peach
Bluebell, lavender, orchid
pear green, marsh green
ice grey 1 & 3
caramel, tan

As a postscript, I had a lot of really hilarious emails sent to me yesterday from a number of blog friends, it seems that so many people have had very funny experiences attending funerals, or related events. I suppose it is a triumph of the human spirit that we can find humour in sad situations, and smile through tears. Thank you all so much for writing to me, you made my day, and your stories had me crying with laughter

Monday, 11 October 2010

Scaaaary...............

I made some cards using the new October 31st cartridge for Scrappy-Go-Lucky. This cartridge is not about cuddly little ghosts, it has a dark side that would be adored by teenagers. It's full of jagged edges, and scary images.
I used one of the borders for the jagged cut on the left, then cut the lantern at 6", and backed bits of it in orange cardstock. The sentiment is one of Studio G's halloweeen stamps from last year
To see the other cards I made, pop over to Scrappy-go-Lucky's blog


At last, I have a Dunkin experience to share with you, and yes, hand on heart this is exactly what happened. I was sitting in the sunshine when an elderly African-American woman, all dressed up, and carrying a walmart carrier bag, sat down at the next table. 'Hello honey' she said with a beaming smile. We started chatting, she was with her son and granddaughter.
'It's my husbands anniversary today' she announced
'oh, happy anniversary' I cried
'No, it's the anniversary of his passing' she said 'we always go to church then come here on his anniversary and birthday'
She unfurled the walmart bag to show me an ornate urn
'he normally lives in my china cabinet' she said chattily
Well, what could I say? How did I keep a straight face? What did I do?
I whipped out my notebook that I keep handy for when inspiration strikes me, and wrote a note to my kids, I will put it with my will!
Dear James, Edward and Alexandra
When I am no longer here, please don't carry me around in a walmart bag. Don't feel you have to buy me a coffee on my birthday, you never felt compelled to do that when I was alive, so don't feel you have to start now. I know that none of you own a china cabinet, please don't go out and buy one just for me
love
mum

Sunday, 10 October 2010

Spookie Dookie

Here's a little feast of Halloweenie cards today, all done with the new download from Funky Hand, called Spookie Dookie. For only £3.49 ($5.40) you get 20 downloadable papers, plus toppers and sentiments. The beauty of downloadable papers is that you can mix and match, and make your own double sided paper for projects quickly and easily. Lots of inspiration over on the site from the design team. Go HERE for the download


These cards are what I call 'cuddly' halloween, come back tomorrow to see the spoooookier stuff I did for Scrappy-go-Lucky. You should head over to the blog NOW, there is a prize of $100au up for grabs to be spent in the SGL store, and it is so easy to enter
I am getting ready for my Best of Both Worlds blog candy giveaway, starting monday, you won't want to miss it


Friday, 8 October 2010

I am sending knitting cardstock to.............................

Hi again everyone, I forgot to put a list of the peeps who wanted to get their hands on the knitted cardstock from Michaels. There weren't a lot of you from outside the US, so I am sending you all some. I won't be sending the envelopes to cut down on mailing costs, but you will all get a few
Can the following please email me at enfysc@yahoo.co.uk with their address, and I will get some in the post to you. Have fun!
Zoe (Australia)
Maile (Hawaii)
Diane (UK)
Tereesa C
Sandra (Misty) (UK)
Pauline (Newcastle)
and
StamperSue (UK)

Advent Box for Kiki

I found this MDF advent box in Hobby Lobby, and decided to get one for Max and Kiki. Here is Kiki's.
I sprayed the whole box with blue paint, and sprinkled glitter (my girl does love a bit of glitter) onto the drawer fronts whilst the paint was still wet. I covered the sides and back of the box with paper by HOTP. I then sprayed the little wooden stars I found in Michaels, and hand wrote the numbers with a black memento pen
I stuck some little metal white and silver snowflakes randomly over the front, then added a few of those tiny christmas tree wooden ornaments you can buy - I stuck those on with a hot glue gun

I had big plans to do something handmade and cute for the sides of the box, but then I found these really lightweight wooden Santas. Perfect. So I bought two and stuck them on with hot glue.
I loved the tiny little wooden Christmas ornaments I found for the front, lovingly hand made in China of course.

I have had such fun finding stuff to go in the little drawers. It's a challenge to find things that are
a. inexpensive enough
b. small enough
c. not too heavy
No doubt when the drawers are filled, and it's ready to mail, it will cost me the equivalent of a years wages for the person who made the cute little wooden ornaments, just to get it across the Atlantic. But hey, she's worth it.
I was making Max's box at the same time, his is green and red. So by this time, the floor of the garage was streaked in red, green and blue paint, and I really should have taken a photo of my hands, you wouldn't believe the mess I got into. To cap it all, the paint was very, very, very pungent, and poor Mike had an asthma attack, the first one ever. 'Have you changed your diet? Been exposed to anything toxic?' asked the doctor. I sat guiltily on my red green and blue toxic hands, trying hard to hide the evidence.
Yes, he's fine now thank you.........
See you tomorrow


Thursday, 7 October 2010

UR turtley cool!

Here's a card I made with the Cricut Live Simply lite cartridge. The turtle was cut at 4". The papers are all anonymous ones that I have had hanging around for ever.
I love thinking of punny sayings to go on cards - this one made me smile. I hand cut the grass, and doodled around a bit. It's not the greatest photo today, sorry, I think I pressed the shutter too quickly and was too lazy to go back and take another one...


Be sure to keep checking back here, I am getting ready for a big blog candy giveaway, and when that's over, well, I can't wait to tell you what's next in the candy drawer.
So far, all my visits to Dunkin Donuts have been peaceful, ordinary and rather boring........ where have all the eccentrics gone?
See you tomorrow


Wednesday, 6 October 2010

Look what I found...... I'll send some to the UK

Look what I found in the dollar bins at Michaels. Packs of eight 5" x 5" cards and envelopes, all printed, front and back with knitted images. They are perfectly plain, with no greeting, so effectively, you are getting eight pieces of 10 x 5 printed knitting card for a dollar.
I have seen cards in the past where people have scanned a sweater or jeans to get a realistic fabric paper, now you don't have to bother doing that, all done for you, and at that price, it must be a bargain............
So what did I do with them?
For the first card, I used a snow embossing folder by Kars for the background, then cut the cute sitting snowman from the Snow Friends cartridge at 4 1/2". I used the green cable knit card for his hat and sweater, and added a pompom


Then I decided to use the jacket from the Sport Mania cartridge, and skis from Winter Woodland to make a male card for a skiing enthusiast


Doesn't that fair-isle knit look realistic? Yes, I know ski's aren't red, I used artistic licence there....


and lastly, on a snow background paper again, I cut a red cable mitten and hat. The hat is from Snow Friends, and the mittens are from Joys of the Season


I can see Kiki wearing these, they look so snuggly!


The only drawback to this great find, is that the cards are printed on glossy paper, they would have been even better on matte.
Now I also know how very irritating it is to be in the UK, and visiting blog friends who are banging on about the latest must-have bargain in the USA, so if anyone in the UK or Europe would like a few of these, say so in your comment under this post and I will send an assortment to three of you. Put your name, and where you are from on your comment. They would obviously work with sissix, or any die cut machines. I will pull names out of a hat if more than three want some, I'll put the winners names in my blog post on Friday
edited to say, of course I'll send to Australia as well, anywhere where they don't have a Michaels!


Tuesday, 5 October 2010

Messing around with inks..............

A bit of a project for today - whilst I was tidying up my crafty stuff, I found all my alcohol inks and distress inks, I wondered where they had got to. So I decided to have a play.
First of all I cut a couple of flower stems from my Cindy Lou cartridge at 5", I cut a couple out but decided to go with the droopy headed one...........

then I stamped a Hero Arts script stamp roughly onto a scalloped 6 x 6 white card base
I used a krylon spray repositionable adhesive to stick the flower onto the card


then started dabbing away with Adirondack acrylic paint dabbers in copper and gold

I covered the whole thing quite liberally


then peeled away the die cut. The flower shape looked too white, so I used my sponge applicator to dab on some antique linen distress ink


I took a large white Prima flower and dabbed away at that as well with my distress inks, then folded it in half with a glue dot and stuck it on. The sentiment is one I brought out with me from the UK - I think it is by Kanban, that had a liberal helping of distress ink as well

Here's the finished card.....................


and I couldn't let that gorgeously coloured mask go to waste, so I used it on this second card. I used an ivory card base for this one. The script embossing folder is a big one by Fiskars. I embossed the little strip on the side with a cuttlebug folder, swiped with a Perfect medium pad, then brushed with copper Perfect Pearls
I doodled a few dots here and there with liquid pearls, they looked a bit white, so I brushed those with the copper Perfect Pearls as well, when they were almost dry, but still a bit tacky. I like the way the acryclic paint curled the die cut up a little, so it looks dimensional. I stuck it on with silicone glue - I use Pinflair from the UK, I don't know if you can get it in the USA, but if you find it, clear the shelves, it's fantastic stuff. You can use silicone sealant available from Lowes or Home Depot - you put it on in blobs, and the blobs dry hard and raised, unlike ordinary glue that flattens when dry. It's useful for skinny little pieces as well, where a foam pad would show.


For lots of ideas on how to use Ranger products, go to their website. You can get loads of ideas from Tim Holtz as well
I keep meaning to take step by step photos of bigger projects, or interesting techniques, if you have found this useful let me know, and I'll try to remember to keep my camera handy - it's a lot easier than taking a video where I have to edit the floor, ceiling and the sound of the telephone ringing, out of the frame!
See you tomorrow - I am making some cards with an exciting new find from Michaels dollar bin.

Monday, 4 October 2010

Sweet Christmas - for Lili of the Valley Challenge

This week's challenge on Lili of the Valley is a sketch by the uber-talented Bev. You all know how I love these little stamps, and for once, I had time to join in
Here's what I came up with............


I used a Promarker to ink the sentiment stamp (by studio G) so that it coordinated perfectly, and there's a lot of stitching on the card but in white, so it is very subtle


Isn't the little image adorable? I can remember Edward with a tea towel on his head at kindergaten, looking just like this little chap

Promarkers used:
Blush and pastel pink
powder blue, denim blue, ice grey 1 & 2
sandstone, tan, caramel,
papers are by Papermania (UK)
I hope you all enjoyed the party over at Papercraft Inspirations? It helped to get me kick-started with Christmas cards, so you will be seeing a few on here from now on. No doubt the warm fuzzy feeling I get when I think about Christmas will soon be replaced by intense irritation when the shops start playing Rudolph the Red Nosed Reindeer music in October.
See you tomorrow


Sunday, 3 October 2010

Papercraft Inspirations Christmas Blog Party - day 2

The big weekend blog party is still going on over at Papercraft Inspirations, loads to see over there, and there will be new posts going on during today as well - lots of freebie downloads for you over there.
Here's a couple more Christmas card predictions. Firstly, I think the vintage look is going to cross over with shabby chic, so you get a cleaner, simpler vintagey look.
I stamped the Santa (by Woodware) in adirondack espresso ink, and very lightly shaded just some areas for definition. The crushed velvet ribbon was easy to wind into a rosette, and I added some pearly strings. The faded looking background paper is by Papermania

Secondly, trims are big news at the moment, especially pom-poms. On this card I used a wide ric-rac topped with a black and white bobble trim
The stamp is from Darcie - I love it, especially the sentiment. I think this card will be dropping through Alex's mailbox!
Back with more tomorrow


Saturday, 2 October 2010

World Cardmaking Day

Today is world cardmaking day, and I have made a few samples for the Papercraft Inspirations big blog party. Why not go over there and take a look - lots of inspiration and fun going on, with some great giveaways too.
I was asked to make cards using current trends, and this is my first prediction, that non-traditional cards will remain popular, but instead of the purples and blacks of last year, there will be a move to pastels - almost baby colours.
So this is how I coloured in the little image from Lili of the Valley

Here is the base image, I cut around the stamped image with my nestability circle die. I wanted her scarf to overlap the edge of the circle, so I cut around that by hand and lifted it over the circle die so that it didn't get chopped off...................

I wanted to achieve a very soft pastel look, almost like an impression of colour, so I went over the largest central part of the image with a blender pen, you can just about see the grey shadow, which is the wet area the blender has covered


then I applied a wash of colour to the hem of her coat, taking it up to the wet blender pen area


and went over the whole area again with the blender to soften the line


I worked in small areas so that the ink would stay nice and wet


When the colouring was complete, I added some glitter to her sweet little hood, and a couple of white pom poms to the scarf. The little metal snowflakes were a box I got at the end of the Christmas season last year, I think they are meant to be table confetti,
Promarkers used:
skin blush and pastel pink
scarf pastel pink and dusky pink
coat cool aqua and duck egg
hair primrose and sandstone
I will be posting more of the cards I made tomorrow, in the meantime, have a lovely cardmaking day


Friday, 1 October 2010

Two new challenges

The first of the month means another challenge over on Funky Hand, this month Lythan set the challenge
Use at least five Funky Hand papers/elements
So I made a word book with the new Christmas download, available from the site now
These word books are easy to do, you just print out the letters you want and cut around them

I just print on the back of the sheet so that it matches with the paper on the facing page. I got it all ready for my sister to put in photos of her little grandsons, she will give it to her son at Christmas
I used my bind it all to bind the book together

Why not have a go at the challenge? Go over to the blog to see the rules, there is a prize each month for the winner.
On to the next challenge
Friday is Polkadoodles day and the challenge this week, set by Dee, was
Fancy Folds
So I made this swing card, I have no idea what this is really called, swing card thingy should do for now
I used papers and elements from the Sundae of Seasons CD

Difficult to photograph, but here's the front of the card


and this is what happens when you open it, the message swings around. As usual there is a prize for the winner of the challenge, why not have a go, I dare you.......


No need for anyone to worry about the American economy. All will be well. My sister and I have visited every store within a 50 mile radius of here. She went back with an extra case, and one seriously overweight one.
See you tomorrow