
Home Tutorials About Me Video's Cards for Sale

Tuesday, 10 October 2017

More Braided Grace - and don't forget the giveaway

Here is my second card made with the Becca Feekan die shown yesterday. To enter your name for the giveaway of this die, go HERE to make a comment

I went for Christmas today........


This one is quite simple - just the gorgeous  shapes cut in white, but they really pop against the red base card. I used the word JOY from the Die D-Lites set Ho Ho Ho and the flower (which looks a bit like a poinsettia) was cut with a flower from the Month 7 Die of the Month Club. Did you know that Spellbinders have monthly clubs? You can choose between a monthly card kit packed with all sorts of goodies, the large die of the month club, etc.

Here's a reminder of the die I am using this week, and giving away to one of you. Click on the link at the top of this post to leave your name for the giveaway


I'll be back tomorrow with my next card, see you then x

Monday, 9 October 2017

Spellbinder Giveaway

Over the next few days I will be posting cards made with the beautiful set by Spellbinders called Braided Grace Square designed by Becca Feeken. I have one of these die sets to give away to one of you - all you have to do is comment on this post, and look at all the samples I am going to show this week. I will draw a winner on Saturday, 14th October and will mail worldwide, so you can enter wherever you are.....


Here are the die cut shapes - I cut the frame separately, but you will see from my examples this week that you can produce masses of different looks just from this one set......in my hurry to grab a photo I forgot to add the lovely embossing detail, the iconic mark of a Spellbinders die, but you will see it on the cards.....


 Here's my first card, You can see that I cut the pretty shape out twice, and rotated it to give a layered look. The patterned brown detail in the center is a piece of patterned acetate (one of those things that looks better in real life. I hand cut the banner, and added a die cut sentiment from the Sentiments Three set


Be sure to pop by tomorrow to see the next card I created, and don't forget to leave a comment to be in with a chance of winning.....x

Tuesday, 3 October 2017

Becoming a house builder - for Spellbinders/Spellbloggers

I had such fun making these little houses - I wanted to make them as Christmas houses, so added snow to the roof and gardens......find the Build a House  die HERE


I used small dies from other die sets for some accents - the circle on this next house is the dial from the phone in the HELLO die set, I thought it made an interesting architectural feature!


For this next house, I used corrugated card for the roof, dry brushed with white acrylic paint and given a scattering of flower soft white 'snow. The wreath on the door is a flower center from the month 7 die of the month club set (I punched a hole in the middle of the die cut to make a wreath, and added red perfect pearls berries). The brick pattern on the walls was inked through a stencil


This next one had a brick stencil inked onto the walls, the roof was given some texture with an old embossing folder I had. The little banner was cut from the Flight 2 die set......It was fun altering the details so that the houses looked different - for instance, I drew a line down the center of the door in this one, to turn it into an imposing double door entrance


You can leave one side of the roof free, so that it can be opened to take a LED tealight, but I found this impossible to photograph, you will get the idea if you watch Yana's video (link below)


I had a lot of inspiration from watching a video made by Yana Smakula with her version of these houses - watch it HERE I especially liked her idea of cutting windows and doors out of fun foam to give dimension, and using vellum behind the windows, which I did on all my houses

The ridiculous thing was that I found myself being quite obsessive about the details of these houses, the colours had to complement each other, and the picket fences all had to be white (hey, I'm the CEO of this homeowners association, I make the rules......). I also found myself worrying that if I put the fences across the fronts of the houses, the little people living in there wouldn't be able to get out of their gardens to take the little dog for a walk - I know, nuts! 

Thursday, 28 September 2017

Count the Stars.....Spellblogger for Spellbinders

I love this Spellbinders set called Count the Stars by Debi Adams. Find it in the store HERE - I like the fact that you could make cards personal for any age, and the style lends itself really well to those male cards


I chose to make a couple of cards for children, and just cut a bunch of colourful numbers out - the spares are all in a little bag ready for the next quick and easy card! 

This next card just had the numbers cut out of the navy paper, which was layered on top of the teal card, I saved the little pieces to add to the 8, 6, etc


Here is the set - you get the stamp sentiment (love the font), the numbers and two star dies


Thank you all so much for your lovely comments and emails about the wedding post, and for your good wishes for Mike - unfortunately, he is still unwell, but the doctors and hospital have been great, and we are hoping he will be better soon. In the meantime, my craftroom is my haven and 'chatting' to you brightens my day......x

Tuesday, 26 September 2017

Wedding! A day to remember..........

Sharing with you some photos of Alex and Declan's special day. After months of planning, it was a beautiful day - didn't Alex look gorgeous?


I had to show you my outfit - and the shoes!


Molly had a bit of a starring role - she spent the ceremony beaming and waving at everyone over my shoulder.......

Sadly, a shadow was cast over the day by the fact that Mike, my husband wasn't well enough to attend. It clearly was a sadness, Alex was 'given away' by her elder brother James. It also meant that I had to give the traditional 'father of the bride' speech - gulp!


In this next photo my new son in law is telling me he will always be my favourite son in law - fair comment as we only have one daughter!


On to some of the little details. We had a 
Candy Bar, stocked with lots of handmade goodies - lots of homemade fudge, truffles, peppermint creams, coconut Ice....the little green decorated fudge at the front of the table was Irish Cream Fudge, decorated with shamrocks, to welcome Dec's family from Ireland.......I made the little candy tree as well
I found someone to make the little sign on eBay, and I filled a wicker basket with little kraft treat bags decorated with twine and punched hearts, for people to fill with sweets/candy to take home with them


We wanted a natural rustic sort of look with simple flower arrangements - they were put into jars (the florist was still working when I took these photos, the second jar hadn't been filled). Instead of sparkly table confetti, I ordered a bunch of little wooden hearts and scattered those around the table. We wanted wood slices, boy, are they expensive. So I contacted a local tree feller, and asked him to cut me some slices, leaving the bark on. They cost me a fraction of any others I found. We sanded them down and gave them a coat of matt varnish 
 These were rustic little jars that I filled with scrolls and a pen that looked like a slice of wood, and a label asking people to write a message for them to open on their first wedding anniversary - much more fun than a guest book!
 They decided to use places that were special to them for table names, so the table plan, set on an easel was printed saying 'Where in the world am I?' - it looked cute! 

 I used a large birdcage that I already owned as a post box for their cards. I found some large wooden hearts in Hobbycraft, cut out some vinyl letters on my Cricut, and tied them onto the birdcage with twine 


The civil ceremony was held in a separate building, and again, we kept the decoration simple, a froth of gypsophilia (baby's breath) on alternate aisle chairs.......and wicker hearts on the others. A scattering of rose petals along the aisle........


I made some programmes for each chair, using a Spellbinders die......


because it was a civil service, the order of service left room for an Itinerary for the day - I was keen to do this, having spent hours at weddings whispering 'what time are we going to eat, I'm starving'

So there you have it, the Cashmore/Harkin wedding in a nutshell. All the planning was worth it, despite Mike not being there, it was a wonderful day, and all that's left to say on this post is wishing Alex and Dec all the love in the world and best wishes for a long and happy life together xx

Friday, 15 September 2017

Snowflakes for Daring Cardmakers and Spellbloggers

Today over on Daring Cardmakers, Dawn sets the challenge. She is celebrating her 40th birthday this month (happy birthday Dawn!) and wants to see four elements on the project.

I decided to use the Create a Flake Six die set by Spellbinders for my card. I cut four snowflakes out of Vellum, and cut one out of card, which I used as a stencil to make a background 


To tell you the truth, it went against the grain for me to use four snowflakes, I always have a design rule to use an odd number of elements on a card, it always looks better. But I think this snowflake card worked because of the stencilled background to balance it


As you read this, we are now two days away from Alex's wedding, things are hotting up!  Tomorrow evening we have a get together here for about 70 people, an informal pig roast. Then the wedding on Sunday. Be prepared for photos next week, and wish us luck and sunshine for Sunday

Tuesday, 12 September 2017

Triple Flip Birthday Card - for Spellbinders Spellbloggers

Another Triple Flip card today, looking very different to yesterdays. This time I used very bright papers for an explosion of colour, and the Flight 2 die set for the hot air balloon and the clouds........


 The sentiment is from the Special Birthday Sentiments stamp set by Spellbinders.....


 I did a shot from above, to try and show how the card opens, almost like a book


and for all of you intrigued by this die, here it is, a simple square, which cuts and scores all in one pass of your die cutting machine. The die measures 6 x 6"
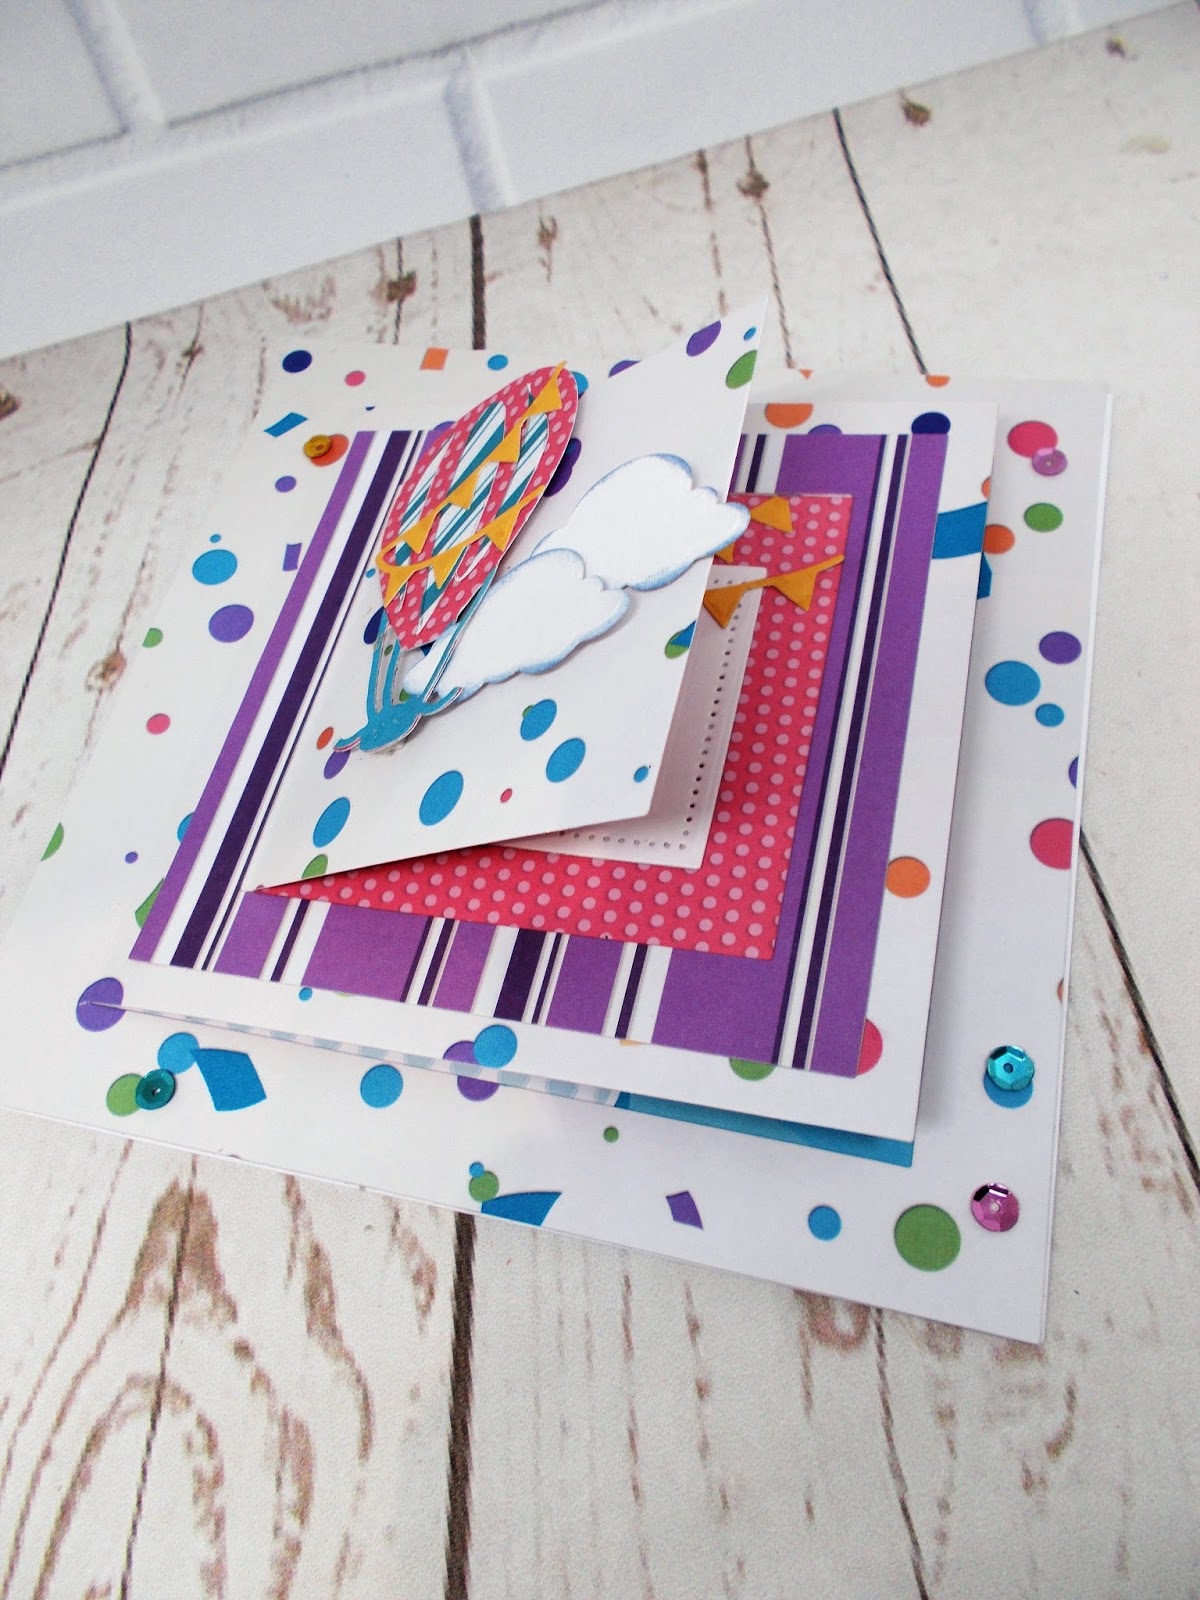
So much fun! I am planning Christmas cards for the children made with this, they will love flipping through it to see little Christmas scenes on each layer

Monday, 11 September 2017

Triple Flip Card for Spellbinders Spellbloggers

I love this die! Called the Triple Flip Card Creator,  the resulting card is just such a lot of fun and so versatile. Just one pass of the die cuts out a 6 x 6 card front with cute little opening windows, a bit like a book. You can go crazy with the decorations as well.......


I used the Square Pierced Shapes dies to cut various frames for the layers, and added pretty accents from the Braided Grace Square and Luscious Labels One die sets. You can find all the dies used HERE


Pop back tomorrow for another take on the Triple Flip card - this time, much more casual.......See you then x