I am so bad - I haven't even been here to wish you all a very happy new year. Put it down to the usual seasonal ailments and a hectic couple of weeks. Anyway, here I am.......and of course I wish you all a happy, healthy and peaceful new year
I thought I would share my thoughts on a new 'toy' - the
Spellbinders Glimmer Hot Foil System, this post is the result of my very first efforts, literally snapping away as I went, so it's a honest commentary on my first impression. I didn't do a video, as there are so many professional ones out there that do a much better job than I could. There is a good one that explains the process HERE
The box contains everything you need to get started....the machine itself, a spacer plate and shim, some foil, and some accessories.....There is a rubber mat for your hot plates to cool down, and some nifty little magnetic tweezers to lift the hot plates off the machine. You get a couple of rolls of foil, and two foiling plates, a pretty floral wreath, and a Best Wishes sentiment
To get started, simply switch on your machine,
wait for the platform light to glow green. Place
Your foiling plate onto the rubber platform face
up, switch on the timer and wait for it to stop
flashing.........
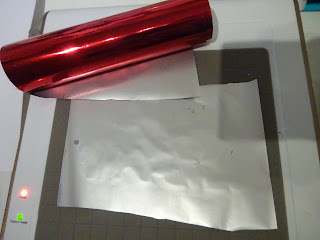
 Now cut foil to size and place it (coloured side down) onto the hot plate. Cover with your card, the grid markings on the rubber surface make it easy to align your card. Place the shim and spacer plate on top. Now the whole of the heated platform can be pulled out of the docking station and taken over to your die cutting machine (I keep mine next to each other so the whole process is seamless)
Run the heated sandwich slowly
through your die cutter. I understand
that most die cutting machines are
compatible with the system (apart from the Cuttlebug)
When you take away the shims, this is what your cardstock will look like.....
Now simply peel away the foil, and you are left with this gorgeous foiled and impressed image. It actually has the appearance of foiled letterpress, just beautiful
Don't waste the left over foil - put a piece of waste card over the rubber surface, then the cardstock you want to foil. Place the waste foil (you can see where the LOVE word in the photo above has left a negative in the foil.) Cover this with a couple of sheets of card, then the normal shims, and run through your machine as before........
This time, you will get a gorgeous foiled background, with the negative showing in the background colour. Because I was just experimenting, I didn't cut my foil straight, or placed the foil plate centrally, but if I had done this, I reckon this would look fabulous on black cardstock
Lastly, I tried foiling using just a regular wafer thin die, I need to play around a lot more with this, but it opens up a whole new world of foiling. The little band on the left is a Spellbinders die called Romantic Agenda. I found that sentiment dies worked well, but forgot to take a photo. I think, with time, I will be able to look at a die and assess pretty accurately how it will look when foiled
The foils are inexpensive as well, and each roll has 15 feet of foil. You can use tiny scraps for small sentiments as well.
I suppose the only downside as far as I can see is the cost of building up a library of foiling plates, but they don't cost any more than regular dies. I think that this initial cost is offset by the fact that you can foil using regular dies, and, let's face it, that cost comes with any new bit of kit we get......I think I bought every embossing folder on the market when I got my first little Cuttlebug! I'm sure, like everything else, as more and more foiling plates are released, there will be sales, and special deals appearing
So I hope this has given you an insight - I just wish you could come round for a coffee and we could explore the Glimmer a bit more together....xx


